ABOUT ME

ABOUT ME
ABOUT ME

My Store

My Store
My Store

Free Resources

Free Resources
Free Resources

6 Ways To Fit Science Into Your Day


Trying to teach intermediate students science isn’t always easy. There are a lot of supplies to often set up and the concepts at times are much harder to explain. Often, science can even get put on the back burner. I am asked by other educators how do I find that extra time that is needed to give quality science curriculum? So, I want to share with you today a few quick tips to finding that time and making it count!

Targeting Standards

1.      Make sure that you are pinpointing the exact standard that you want to cover. whether it is 
NGSS or your districts requirements. Utilize the NGSS cross cutting strategies within their plans. 
That is a great guide to how you can even add the required concepts within your reading and writing 
lessons.

Non-Fiction Science Connections

2.      Non-fiction reading in common core and in NGSS cross cutting … is a perfect way to add 
science concepts. For example, having a hard time fitting in ecosystems or food chains because the 
supplies needed seem a little out of reach? Then, a non fiction book and science/reading station is a 
perfect way to add a concept that seems out of reach. I purposely utilize Epic books which has a ton 
of great non-fiction science themed books that are perfect for your reading lesson. They even have a 
variety that can be read to students in order for you to differentiate learning. 

Tie that in with digital resources and are set to go! Digital resources come in so many different 
options. From Boom Cards to Google Slides it also allows for teachers to find ways to add science 
into their day! 


Science Stations in Reading/Writing

3.      Science Stations during your reading/writing block is another way to use your time wisely. If 
you incorporate a non fiction book along with a small experiment that has easy to follow step by step 
directions, this is another way to use your time wisely. Allowing students to share their learning with 
an app or internet tool is way to assess for understanding. My new go to for this is flipgrid. 

I set up a class grid, allow for students to go there for my pre-recorded instructions that I video for 
them, or you can even insert a youtube video  showing an experiment that you find online. If you just 
want them to learn more background knowledge about a science topic allow for that video to be 
inserted on flipgrid as well! Many of my colleagues are able to utilize google classroom which I wish 
I was able to use as well. Our district required their own paid version to house lessons in, but another 
great way to add science lessons in an app for them to utilize can be stored in google classroom.

Flipped Lessons


4. Flipped lessons are my new favorite way to teach science after going virtual this year. A flipped       lesson allows you to prerecord a lesson, a concept, and/or background information that you would have used class time for. As students view the video before class, they are getting the needed information that you would have used class time for. This frees up time for you to do demonstrations and experiments and not use the time in class to do that. I still need to review the concepts for friends that didn’t watch ahead of time, but if a student misses out on the experiment, because now they must first watch the video and do the follow-up questions, they don’t want to miss the “fun” stuff. The amount of students not watching the prerecorded lessons declines.  I also find that if I record my demonstration then the students that miss out can now see that or review if they missed something.
You might be saying that is  a lot of time that is used to create those videos, but once you have them and you label them, you are set for years to come. I use screen-cast-omatic. There are other video sites such as screencastify that work perfectly well, too.  Not sure you can know what to say on your video? Use a teleprompter program on your computer and read what you would like to say. you can see how I do that in my video link here:

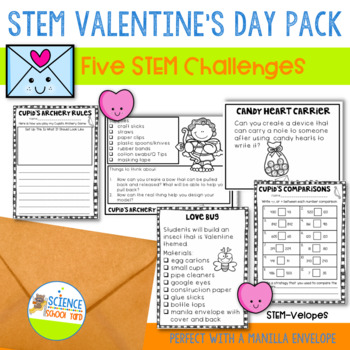
Supply Short Cuts and Quick Lessons

5. Find lessons, that are already made for you. If you have a kit such as FOSS, which we use, bag up the lessons for easy year after year accessibility. When we went into quarantine mode, it was a bit easier for me to grab my lessons out of the box, because they were all labeled and prepackaged. I put mine in plastic ziplocked baggies and label them with permanent markers and place them in the kit along with the sheets I used for the lessons if I utilized printed versions. If you have no kits, then make sure that you find a storage system that works best for you. I tub my kindergarten lessons along with the picture books and supplies I even use for it. This really does save a ton of time. If you don’t already do that then you will thank me!

Boom Learning Decks


6.Boom learning decks are another go to for easily checking my students for understanding! I create decks that focus on my big ideas. I can give my students a boom deck right after I teach conductors and insulators to see if they got my lesson and the concept I was teaching.   It allow my students immediate feedback to their learning and if you utilize the data you can use it for grading purposes.

Take a look at these science boom decks that can make adding science to your day a little bit easier!
Science School Yard Science Boom Decks

I hope you can find ways to add science to your busy day...your kids will thank you!


Shop Science School Yard TPT store!

Top 4 Tools To Help Teach Science Remotely

Remote learning by any means has not been easy for anyone. We all had quite a learning curve dealt to us, but it is how we have been able to adapt and find new ways to get to your students that is key to everyone's success! What I have found in the last six weeks, is that I keep evolving and finding new ways to implement my lessons. To help you find new ways, too, I am sharing with you my favorite finds. Here are my top 4 teaching tools that have got me through teaching remotely. 


Flipgrid


I have been using flipgrid for a meeting place for my Science Lessons and classrooms. This has allowed me a site that I can see my students, check for understanding, as well as have the accountability that I need.  I am able to star the assignments that I have looked at and even comment back through an email setting, or even create a video for them! I also utilize the ability to host a five minute or less video review lesson or even share a video from youtube for them to watch. You Tube might be a great place to house your video lessons that are over 5 minutes then for them. Students can showcase an assignment by showing you what they did and explain their thinking. 

Flipgrid are the meeting place for your classroom, your school, your department or any learning community to discuss topics or lessons. Flipgrid sets up an  icebreaker. For science you can have students add lesson/experiment reflections, share their thinking, explore STEM principles, give mini-presentations, and showcase their learning. Setting up a rubric so that the students can see what they need to do to show you what they know can be utilized by adding a document to flipgrid.

 How I use it:
  • I voice record my lesson
  • I can star the students I graded so when new ones come in, I know where to start
  • I use the mixed tapes to store the science stars of the week 
  • I use the mixed tapes to store students that still need my help
  • I have students share their thinking and then I can check for understanding using a rubric
  • I share videos I want them to view from youtube
  • I email back to the students a personal message
  • It allow students to view their friends and make comments on what they liked and learned


Screencastify or Screen-cast-omatic


Screen Casts are designed from the ground up to be the safest, simplest video creation tool for teachers and students. I can  make learning more personal for my students and can provide my science lessons each week for distance learning. In the future I can use them for flipped classrooms lessons, by recording lessons, assignment explanations, and giving my students verbal feedback. I can tape myself incorporating a lesson, and use the teleprompter to write my lessons and then choose web cam and screen, make my cam the smallest it can go then teleprompt above so it looks like I am looking at the camera! I just start the prompter and it allows a space at the bottom for me to put the web cam! 

How to use it in your science classroom:
  • screencast an experiment so they can watch it before, during, and after class
  • tape your lessons for kids that are gone
  • give directions for assignments to share out
  • screencast a lesson introduction
  • use for flipping lessons and saving time once they come to class if they view it ahead of time

Boom Learning
I have loved Boom decks for my students! Boom is a platform that allows teachers to purchase and/or create digital activities for students. Boom “decks” are made up of individual, digital task cards for students to complete.
I use Boom for...
  • Differentiating my science instruction, different decks for different kiddos
  • It gives students immediate feedback (dings for correct, oops for incorrect and they get to try again!)
  • Students Get EXCITED about learning with badges and fun digital “rewards” for their work
  • Holding students accountable for their independent work especially in stations or at home
  • It saves me a ton of time because it automatically grades. 
  • It also saves paper...it's paperless!


What do I need in order to use Boom in my classroom?

  • A computer, tablet, or interactive whiteboard
  • An internet browser that is 3 or fewer years old (OR the free Boom app)
  • A free or paid  Boom Account (if you open a new account and click a link you get from a TeachersPayTeachers Boom card purchase, you’ll get 3 months free btw)
  • An internet connection that students can use on a computer/tablet to access the Boom decks
  • you can have a free account which will let you utilize fast pins when purchase them, but won't grade them and keep data which a paid membership will do.
Option A: Copy and paste the complete link for students to play
Option B: Go to the Boom main page (boomlearning.com) on a computer (or on the Boom app). Click on the “FastPlay” button. Enter the pin and click “play.” A fast pin is only good for a certain amount of days (14 days) which will tell you on the fast pin button. 
You can create your own boom decks for your students, send the deck link to families or students and it is one of the simplest tools to use and the kids LOVE them! Boom Learning Site can be found HERE!

Google Classroom
Google Classroom  is a free service for schools, non-profits, and anyone with a personal Google account. The best part of this is that a teacher and student can use in and out  of schools. Classroom saves time and paper, and makes it easy to create classes, "hand out" assignments, communicate with each other, keep track of student assignments,  and be organized.

How to use it in science classrooms:
  • Once set up, you can share a code with your class to join. Once they join they can find your assignments, videos, and class work inside the class.
  • This is paperless, so it saves time with copies
  • It allows everyone to one place for organized science lessons, google documents, flipped lesson videos and more!
  • This allows for easy communication and can be used in class, in their homerooms, and at home on any device.
  • Best yet, it's a google suites product so it connects with all your other google activities such as google slides and forms!
I would love to hear what tools have gotten you through this as well. Keep on keeping on!


Shop Science School Yard TPT store!

Remote Science and STEM

As we are learning how to teach remotely, we find ourselves learning how to be even more flexible than before. We see our students and families struggling and may even be struggling a bit ourselves. Our district last week, asked us to take a step back from the rigor of what being in school is like. We stepped back to reflect on what is so very important right now, the mental health of our students and parents. To continue to provide learning opportunities, our encore team chose to celebrate this week through a STEM challenge! We are creating crazy hats and then wearing them at our google meet with our students!

This is just a start to the STEM challenges that can connect us all!  We want to find ways that students and families can do something fun and hands-on together with the supplies they have around the house.

Here are our challenges for the next few weeks:

1.  Crazy hat design and share with the focus on how we know that this is a big crazy, but how can we make the best of it? How can we support you? What do you need?

2. Make it move and dance party, connecting what we need to do to stay active for our health and our mind

3. Building Connections: blocks and Lego or recyclables and share your favorite virtual lesson so far

4. Tower Talk: building towers and talking about positives and how to make lemonade with lemons

5. Bridge Building problem solving session share what might be hard and what we can do together to support each other

6. Future's so bright I gotta wear shades sunglasses challenge and what we want to see for the future

7. It's getting warmer, let's make some summer shoes to share and have a virtual runway show and summer send off!


Supply List From Around the House:


  • egg cartons
  • junk mail for paper
  • empty food boxes
  • toilet paper rolls
  • plastic cups, forks, spoons
  • rocks
  • sticks
  • pencils
  • cans
  • toys
  • Legos
  • jars/bottles
  • tissue
  • plastic bags
  • paper bags
  • baggies
  • aluminum foil
  • plastic wrap
  • wax paper
  • paper towels/napkins

Want to find this distance learning pack already to go? Follow the link here for Distance Learning STEM pack 1.


What can your students do with simple supplies found around the house? Have fun finding ways to connect remotely with your students! If you want more virtual STEM ideas check out these packs, too!

Outdoor STEM Digital Resource
Diversity/Positive Growth Mindset STEM
Distance Learning STEM Volume 1
Shop Science School Yard TPT store!

Germs, Bacteria, and Virus Science

Wow! What a week. I have to say that I typically don't research germs and viruses, but I can't stop watching the news or reading an article about the Coronavirus. This last week, a long term substitute who went to Italy for a few days, stepped into our school to help the newly hired teacher get ready for her new job before she arrived this next week. Needless to say, our school was heavily disinfected and it now has impacted us right in our classrooms and in our community. Thank goodness she didn't have contact with any children or adults! 

I wasn't going to address the virus in my class, but it has become so much a part of our school conversation Friday, so as the science teacher who works with each student in my school, it was time for me to make sure that we had lessons that could help our students with the understanding of what germs are and how to stay germ free. So, this weekend, I spent a ton of time organizing a new germ unit that I started right off the bat on Monday! 
We have been using Mystery Doug for the germs video. It is pretty good and I am using it for grades K-5th grade with supplemental activities and sheets included in the link below.


Extension Activities and Ideas...
K-1 Activity: Glitter Germs
  1. Get a small bottle of hand sanitizer (good luck if you don't have any now, stores are getting sold out fast...). Fill the hand sanitizer with glitter. I use bigger pieces of glitter and not the small stuff. It is easier to wash off.
  2. Describe how the glitter represents germs. We need to wash away the germs by washing our hands. 
We wash our hands with water first, then with soap and water. I line them up at the bathroom and practice as we wait for someone to finish


    K-5 Cinnamon Test:
  1. I practice hand washing with the cinnamon test and petroleum jelly, too. This one isn't as messy. I ask for 3-4 volunteers, then on their hand they shake with I rub petroleum jelly on it. I sprinkle the hand with cinnamon which represents germs. 
  2. We then shake and give high fives seeing how easy the germs spread. 
  3. We then wash our hands for 20 seconds!
I have used this song to inspire them...


K-5 Activity: Black Pepper Activity
  1.  Discuss the importance of washing hands
  2. Get a flat tray and fill it almost full with water
  3. Sprinkle black pepper on the surface of the water (enough so that the surface is filled with pepper)
  4. Describe how the pepper represents germs and why it is important to use soap and water to wash our hands
  5. Demonstrate by adding a couple of drops of dish soap to the surface and have students observe ( I use a dropper)
  6. The germs will immediately cling to the side of the bowl to get away from the soap
  7. Remind them of the importance of washing their hands (demonstrate hand washing techniques as well as the 20 second reminder of how long it should be! I say two ABC's, the chorus to Frozen, or two Happy Birthday's!)
I am sharing my germ science freebie for the 2020 school year as more and more schools go to elearning. Help your students learn how germs spread, and how to stay healthy with my Germ Science Resource for you found here. 


Stay healthy and safe! Please feel free to share your ideas below if you have any ideas to add to our germ free lessons! Literally, as I was writing this post, we got a call letting us know we are going virtual tomorrow. No time to train our kids or even give them their bags of supplies...wish me luck!

Shop Science School Yard TPT store!


Leap Year STEM

In STEM club this week, we wanted to find a way to add some Leap Year Science and engineering to our hour. The funny thing is that no one really knew why leap year even exists. We generated some great ideas and then we headed over to Mystery Doug to find out the answers. We followed up with some great origami inspirations, which was taught by a student led team... and we finished it up with creating a game that needed to incorporate our frog in some way.

The criteria and constraints:

  • the frog had to be part of the game
  • you only have 15 minutes to prepare the game 
  • the game must have written rules
  • the frog doesn't have to jump as part of the game
  • you must use what you see around the room as the supplies for the game

The science components that we included in day two of our STEM club Leap Frog Theme was to create a controlled experiment using our frogs.


We tested the following variables:


  1. Does the size of the frog make the frog hop farther?
  2. Does the type of paper used determine how far our frog jumps?
  3. Does where we fold the bottom affect how far the frog jumps?
  4. Does how/where we push on the back of the frog affect how far our frog jumps?
Mystery Doug has a great video all about Leap Year, which is a perfect springboard for your leapfrog lessons in science! Find the Mystery Doug video here. 


Leap Frog Leap Year Science and STEM Pack Found HERE.
I am hoppy that you joined me here in the Science School Yard! Happy February 29th!
Shop Science School Yard TPT store!

Landforms In Science

A discussion came up in one of our second grade classrooms this week in regards to the 65 degree temperature that occurred in Antarctica this last week. When the second graders arrived I was ready and waiting to start a new mini-unit that can help my students understand some new vocabulary words along with hands-on activities that can allow them to make the connections they need to start to figure out the why's of the importance in learning about our Earth.

Landforms are one of those topics that at first our second graders and beyond struggle with. Given names to land and water so that we can decipher their similarities and differences. The best part is that at first they might say a park or road is a landform, or even name a landform around where they live, however as they get to see pictures of other habitats or biomes they start to add new vocabulary to their ever growing list.

To help you incorporate landforms into your science/social studies lessons, here are 5 quick activities that I was able to incorporate this week in science in my one hour with my second graders!

Idea 1:
Second graders don't know landform words...I used EPIC Books Landforms by William B. Rice which has some great examples and ways to teach what a landform is.
Landforms (Science Readers: Content and Literacy) by [William B. Rice]

Idea 2:
We then generate a list of words that we heard so far as well as words that describe what land and water words we use around us. We created an anchor chart that can support our new words.

Idea 3: 
We use a landform game that allows for students to get a review of the word landform and what it means. I love using qr codes for the students to access in a game format where they can at their own pace find answers in a scavenger hunt format, write the room format, or even just around the table time.

Idea 4: 
After we review what we found on our QR code activity, we follow up with a quick review from SciShow Kids. These videos are short and packed with a ton of great information, pictures, and vocabulary to support adding to what they already know.

Idea 5:
Now it is time to review again with landform cards that have the picture and words on them. We then set out cubes that they can build the feature that is on the card. We then travel the globe (classroom) to see the different landforms that are found on the Earth's surface.


These ideas help me reinforce the 5 E's of Science...
Engage, Explore, Explain, Elaborate, Evaluate

Engage them by asking what they know...explore what it means with our book, Explain with our QR codes, Elaborate by creating a 3-D model STEM creation, and I like to finish up by turning over our qr code record sheet and draw me three new words they learned followed by a drawing of each!


These ideas, sheets, cards, and lessons can be found in my landform pack. Find the landform pack here!
Shop Science School Yard TPT store!

Valentine Ideas For The Science Classroom

One of my favorite things about Valentine's Day as a kid was making and then giving all of the handmade Valentine's Day cards to the other kids in my class. We made boxes for our cards at home and brought them in to gather all of our valentines and chomp down the candy treats that came along with some of them! 

Now, there are so many other things pulling at us in terms of time, even policies that are in place now that weren't there when we were kids. As we move into find ways to incorporate kindness and positive growth mindset, Valentine's Day is a perfect opportunity to do just that. 

 I teach all of our Kindergarten through Fifth Graders is that at times if I differentiate my big STEM Engineering Ideas I can set up one bucket, create different sheets that work for different grade levels, and when a holiday like Valentine's Day comes around I can be set to go hour after hour...all I have to do is replenish the materials used...and here's a BIG one...have each group that finishes with the bucket to leave it as close to the way they found it as possible! (I find that before we share out...they need to clean up because the group that cleans up first gets to present first.

Here are some great ideas that can really be differentiated for multiple grade levels and find ways to teach about kindness and positive growth  Today was the best when a group of fifth graders were watching the presentations I recorded of the second graders and I heard them say how those second graders sure are smart because their ideas were amazing!  The other weird thing was that our littles were able to work faster and more efficiently than our fifth graders as well!


STEM STATIONS THAT CROSS GRADE LEVELS

STEM Station 1: Candy Heart Carrier
In this one has you creating a short love note using at least four candy hearts in the note. We used note cards for our notes. I love how creative the kids can get with the candy hearts. As for the carrier...give the kiddos some ideas on how to carry mail or objects and they are set to go! Give them paper, string, tape, glue...

STEM Station 2: Valentine Bouquet
This one was so cute...I had them making flowers for someone they loved. Using paper, tissue paper, straws, pipe cleaners, glue, tape...the cutest part was when we got done one of my kiddos came over and gave me their flowers! So super adorable!


STEM Station 3: Candy Heart Dispenser

So I did this one with second graders and fourth and fifth graders...the second graders were so very creative and were able to do it quicker than those older kids. Go figure! I gave them Styrofoam cups (other cups, too but they seemed to go to the Styrofoam), tongue depressors, candy hearts, tape, toilet paper tubes...I love how they could get the candy hearts to come out one at a time. This one really showed their creativity!


STEM Station 4: Love Bugs
Great review of the parts of an insect. Have them include a head, thorax, and abdomen, eyes, antennas, six legs...give them egg cartons, bottle tops, construction paper, pipe cleaners, straws, google eyes...Get them making a love bug for a love bug of theirs to give it to!


STEM Station 5: Cupid's Archery Game 

Having them create a bow using plastic spoons and knives if you tape up the sharp parts, Craft sticks, Straws, Straws, Rubber bands, Paper clips, and good ole' masking tape!

But, Let's talk organization... I love having the supplies in the bucket, but remember to have them clean up and recycle or throw away before they even put anything back in the bucket. Only reusable supplies and unused supplies get put back in exactly like they first saw it. 

I have them clean up before we share and line up. We have a quality control person (bucket brigade) that inspects the bucket and then brings in back to our central location. They are in charge of making sure the team is cleaned up! It works pretty slick!

I will be sharing more tips for easy clean up in an upcoming post!

Want it all in one place? STEM Velope Valentine Pack can be found here! I love these interactive holiday themed activities...just in time for Valentine's Day!

STEM Station 6: Playing With the Queen of Hearths

All you need is a deck of cards and a little clear tape. Even though this might seem easy because you only have one thing to work with...it really can be a balancing challenge. Teamwork is also a great way to bring in positive growth mindset as well as kindness. For each card that they add, one kind thing can be shared with the team by a new person in the group.

Constraints of this activity can range from how many levels need to exist, how high it needs to be, or how many cards need to be used.

Need to find ideas already set to go in packs set for you! Press on the link below to head on over to find what you need to make Valentine's Day Special! From STEM-Velops ...developing engineers...to STEM stations ready for any grade level! Valentine's Day PACKS HERE!

Valentine's Day STEM Pack
Heart Healthy Science Stations
STEM-Velops Valentine 5 Pack
Google/STEM Valentine Digital and Printable Pack
Valentine's Day Themed Measurement Pack and STEM Connections

https://www.teacherspayteachers.com/Product/STEM-Velope-Valentine-Five-Pack-3642059

Don't forget to sign up for our Science School Yard Scoop~lots of great extra freebies in your inbox as well as in our free resource library!

Shop Science School Yard TPT store!
Powered by Blogger.