ABOUT ME

ABOUT ME
ABOUT ME

My Store

My Store
My Store

Free Resources

Free Resources
Free Resources

Doesn't Have To Be Seuss Week To Make Connections in Science!

Every year, when I work with my 3rd graders on their FOSS Water Unit I can't wait until I get to water wheels. It is the only STEM related activity in many of the kits. Don't get me wrong, I do love having FOSS to guide me, but let's just say at times it needs some more meat.

This particular lesson though...is a great way to add in  a ton of ideas that are all water related and I have just the book that makes this lesson even better.

Dr. Seuss's book A Fish Out of Water is perfect. It has double meaning, too! What is it like to be a fish out of water? Have we all been there? (I also love the addition of Mr. Carp telling everyone that this always happens because the boys don't listen)

Here is how it goes...

1. I start off asking what does it mean a fish out of water? We make a list and then I explain that it kind of means the person is completely clueless or directionless when put into an unfamiliar surroundings or an unfamiliar situation.

2. Perfect time for you to ask if they have ever now felt like a fish out of water. Cue the stories!

3. I now add my what is sustainable energy lesson discussing non renewable and renewable resources. Here is how...What would it be like if you had to all of a sudden live somewhere where there was no electricity or running water. Could you let's say...live off the grid? We discuss tiny homes and the movement and what that would look like.

4. Now that they have thought a little about what they could use that is a natural resource or a sustainable resource...we generate a list. Sun...Water...Wind...we even add trees and corn. If we continue to plant them...

5. I let them know that today after our story they are going to be a fish out of water. I am going to give them only...cue FOSS lesson: 5 red wheels, 1 yellow dowel, three binder clips, a string, and Otto! Yes, Otto. A fish out of water. It is their job to get him in the bucket by only using hydro power!
If you do not have STEM, I have a supply list and alternative in My Water Pack on TPT found HERE.

6. I read the book and then share with them how they will, just like Otto be a fish out of water! They must work together to create a water wheel. I then pop up the google search results for images on Water Wheels. We talk about the shape of the wheel that looks like a bike tire. They are to work together as a team to see who can save Otto first.  Competition is what makes this extra fun!

7. Supply lots of towels. Stand back. Watch the magic happen. (I sometimes have to give clues as to what to do, if time is running out, but I wait a while and keep referring back to the water wheel pictures!)

Here are some freebies that you can use...writing connections, pattern, and reflections! You can download them as worksheets or download them for your iPads! I save them to my camera roll...air drop them to my students...then they place it in Explain Everything (you can use PicCollage) in order to be able to insert videos, pictures and text boxes!

3 Page Freebie Found HERE
Don't feel like a fish out of water every time you plan for a science lesson...grab a freebie...follow the plan...check back often!

Oviparous Animals: Hatching a Great Science Lesson

As I plan ahead to next week, I am always thinking about what is on my road map. The plan that is in place for me and how much time do I have until spring break! I wonder if you are thinking those same things???

Most of my friends are busy planning their math lesson and their reading lesson. Some of my poor friends are locked into making sure that they are on the same page as their grade level partners. That is never easy...but how many of you are saying to yourselves what am I planning for Science next week?

Well...think about your reading lesson!

How can your reading lesson lend itself to a science connection?

To play off of Dr. Seuss Week...Horton Hatches an Egg was a perfect example of how I was able to engage my kindergartners to learn about oviparous animals. Let's just say it is a perfect way to take any book about eggs and make it work!!

Here is how I did it!

1. I grabbed some Easter Eggs and printed off my animal cards. I folded the oviparous animals and I took 6 eggs of the same color and put one picture into each egg. I did that for four colors. Giving me 24 eggs. One for every kindergartner.

2. I hid them in the room...easy access and then I had them gather at the carpet. I let them know that we were going to learn a very BIG word today. We practiced over and over. Then we went to the anchor chart where we made a list of animals that hatch from eggs.

3. I then read my Egg themed book! I then told them we were going to search for one egg to bring to a group. All orange was going to be one group...yellow another....and so on. We shared the rules: no running, no opening the egg until the baby was ready to hatch, and no getting an egg for anyone else...everyone needs to find their own egg and ONLY ONE!

4. I then let them find an egg. We gathered in color groups. I had a colored paper egg for them to go to so that they knew where to go! I then told them that I would come around to each next to tap them on the shoulder so that they could hatch their egg. The person tapped could then open it and share an animal with the group that hatches ...making it an oviparous animal!

5. When the team was done hatching all of the eggs we put the papers back in and put them in my egg basket. We all joined at the carpet.

6. We went back to the anchor chart to see what we could add and to look at any misconceptions. We then played the digital google interactive game on the smartboard! I will tell you that my littles love this! Drag and drop! The made the connections and we were able to review what they learned.

               Grab Your Oviparous Animal Pack just in time for Spring! The lesson plan is already for you!
Find This Resource HERE!

This is an EGG-cellent way to welcome Spring!

Dr. Seuss Connections in Kindergarten through 5th Grade!

Read Across America week and do we have things planned! My Media Specialist and I have come up with some clever ways to integrate Dr. Seuss into library and science time! Teaching K-5th grade science allows me each and everyday to see the rotation of grades...so each day I see bigs and littles.

Sometimes, my bigs come in (3-5th grade) and they see all of the projects with art connections that my little are doing (K-2) and they get a little jealous...funny I also think my littles get jealous of the fun science activities that my bigs are doing, too!

I decided that I would challenge myself to find a Dr. Seuss book and idea that fits into what we are already doing!


Digging Dinosaurs In Science

Kids really DIG building and creating! I love to try to find ways then to add STEM activities.

We just finished our first grade FOSS kit Pebbles, Sand, and Silt so it was time for a STEM connection! We learned about Paleontology and Fossils and now its time to build our own dinosaurs!

Let's set up a STEM lesson to see how easy it can be for you, too to add some STEM to your day!

First, Grab a Picture Book!

 I started with this great interactive book where we get up and do hand motions for each of the pages. Dig, dig, dig those dinosaurs...This is a quick book to get them remembering what Paleontologists do as well as what a museum looks like!

Dig Those Dinosaurs

Next, I ask them a question to get them thinking. 

I asked them what types of characteristics did dinosaurs have that helped them survive when they lived on Earth?

We made an anchor chart that helped us write our ideas down before and after the book.

We are going to take a look at another book that will help us see the adaptations that helped both herbivores and carnivores survive.

This is a great book that shows how dinosaurs were different sizes and how they compare to animals that they know. I make sure that they are constantly looking for ideas to build their own dinosaur.

It also shows how herbivores and carnivores lived as well as how they defended themselves.
The students are able to see the spikes, clubs, plates...to add to our list of adaptations.

I share with them the supplies that they can use to make their dinosaur. I ask, "can you see how to make a dinosaur that has legs to stand on and ways to protect themselves or survive? Remember all the adaptations that they can have."

I show them toilet paper tubes, cubes, ten frame, 100 frame, and 1000 frame blocks, masking tape, construction paper, and pipe cleaners.


How Big Were Dinosaurs?

Once you share the items and your anchor chart  list is complete it is time to follow the Engineering Design Process! 

1. Ask
2. Imagine
3. Plan
4. Create
5. Improve

I send my dear students back to their iPads where they open up their Science Notebook in Explain Everything. They start to design and plan what they will create!

Once they have a labeled diagram, they can go to the supply table, get a bucket, and fill it with what they put on their supply list.

Now it is time to create! Sometimes they get stuck. I try not to do anything for them, but I do give them ideas to try. I really want them to problem solve!

When time is almost up, I let them know it is almost time to share. They must share what items on our anchor chart they incorporated into their design. This gets them thinking about the list again which helps them remember what adaptations are.

Time to SHARE!

Sharing is a key component to the engineering design model. It allows your learners to put into words what worked and what they could modify. It also is a chance for others to give compliments and advice!

This is our favorite part. You can do this with partners, table groups or as a large group. We then set up a museum for everyone to come and see.

Kids love learning about different types of dinosaurs...did you ever worry that you said one of the names wrong? Here is a quick video that does a nice job explaining the names and what they mean.


If you are looking for a fun song to share with your kids as they work...here is a fun little ditty...

Need these lessons all laid out with writing connections and STEM activity sheets. Check out my new line of STEM products, STEM Let's Build...

Finds LET"S BUILD A...DINOSAUR PACK HERE

Milk Makers: Changing Liquids to Solids

I love opportunities to help my students learn a little bit about the jobs provide us with products that keep our community in the spotlight. The Dairy Industry helps our own community as we have several cheese factories as well as Dairy farms even just a mile down the road.

The dairy cow is our state Domestic animal. We see them as we drive in the country…However even if you are NOT a dairy state this lesson is a great opportunity  for you to do an easy and quick lesson on how butter is made.

Literally, all you need is a jar with a lid, whipping cream, and a bit of salt! Get your kiddos in a circle and shake. Two minutes later or two times around the circle and you have yourself butter! I love all of the other connections we can make. We use math by creating a survey and vote on if we like butter or not. Seriously…it is so tasty and after the kids get a taste on a cracker…they are hooked!


Here is what I do:
1.     I ask them what are things we get from a cow. We make a list on an anchor chart

2.     I ask them if they know how milk is produced. I  then proceed to share with them that we will be learning about milk makers. We make mammal connections, but we discuss specifically that we will learn about dairy cows.

3.       I show an old Reading Rainbow that reads Milk Maker by Gail Gibbons, but it also does a               great  job adding lots of great details about cows.

4.       I then share with them how we will make butter.

5.     We make butter and then before we taste test we write the process of how to make butter.  A           bit of inspiration in order to taste test…work first then eat!

6.     When we are through taste testing we make a dairy cow art project.


7. We follow it up with our math connection graphing! If you are interested in making butter in your room and need some help…check out my Milk Maker Let’s Make Butter Pack!


Find the Milk Maker: Let's Make Butter Pack HERE

Help butter them up with fun and engaging activities that can teach a bigger concept...Changes in Matter! 

Science Hand in Hand with STEM Prosthetics

I am always looking for ways for my students to feel like they can make a difference. Always looking for ways that my students who come from poverty don't always have to worry about buying supplies to make a cool project. During our 5th grade FOSS Levers and Pulleys Unit, for example, we use the video Caine's Arcade to incorporate STEM and the Engineering Design Process to show how something that one person can do does make a difference. The video also inspires young people to be creative even if you don't have a lot of supplies...a plain cardboard box can become something more than a container. It can open up new possibilities and allow for a young brain to think outside the box...so to speak!


If you are like me...you might be trying to find ways to make your science lessons more engaging while making sure that you still cover the standards that your district requires of you. Our district requires me to use the FOSS units and for our 4th grade right now, we are in the middle of the FOSS Human Body Unit. I was thinking...how can I have an engineering project that still focuses on the human body, but lets them get a break from the FOSS kit. I came across a video that once again inspired me! Take a look...


Just like Caine's Arcade, young people are making a difference and changing people's lives this time! What a great way to spark their interest and get them hooked. Now...how to set it up...

How To LOVE Science...Use A Holiday!

Valentine's Day is just two days from now. This post is either too late or just on time. It is harder and harder these days to fit some science into your busy schedules...oh I know. Even as I teach science everyday...getting our kiddos engaged and focused on tier three words is often very difficult.

One great way to add a little holiday science into your day is by attaching it to a holiday and bringing in all of your components...reading, writing, math, STEM, and science!
valentine's day, STEM, digital activities, science connections
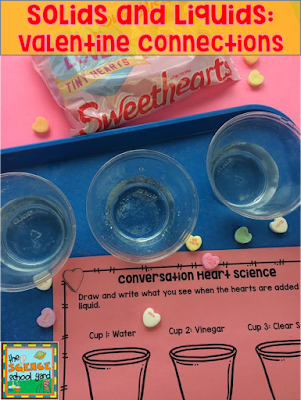
I am all set up for next week's second graders as we get ready to see what happens to candy hearts...our solid...as they get added to a liquid...water, vinegar, and soda! What a great way to add some fun as we are in the middle of our FOSS Solids and Liquids unit! To add to the fun I created a math connection, STEM activity, and writing! I use the writing sheet on our iPads by taking a picture, next saving the image, then air dropping to my kiddos! These activities will be used with my Kindergarten, and First graders, too!
Powered by Blogger.